

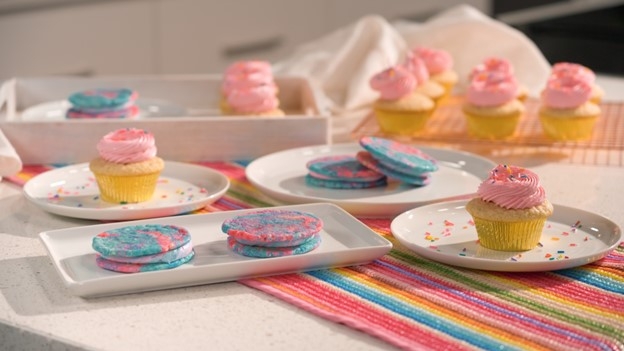
Colourful cookies and cupcakes.
501 - Jenna Rae Cakes' Cotton Candy Cookie Sandwiches and Vanilla Bean Cupcakes
Cotton Candy Sugar Cookies
- 1 ¼ cups granulated sugar
- ½ cup unsalted butter, room temperature
- ¼ cup buttermilk
- 1 egg
- ¾ teaspoon JRC Liquid Cotton Candy
- 2 ¼ cups all-purpose flour
- ¾ teaspoon baking soda
- ¼ teaspoon salt
- ½ teaspoon baking powder
- 1 drop soft pink gel food colouring
- 1 drop sky blue gel food colouring
Cotton Candy Buttercream
- 1 cup unsalted butter, room temperature
- 1 ½ cups icing sugar
- ¾ teaspoon vanilla bean paste
- 2 teaspoons JRC Liquid Cotton Candy
- 1 drop soft pink gel food colouring
- 1 drop sky blue gel food colouring
Cotton Candy Sugar Cookies
- Preheat the oven to 350℉. Line 2 baking sheets with parchment paper.
- In the bowl of a stand mixer fitted with the paddle attachment, cream the sugar and butter on medium speed for 2 to 3 minutes, until the mixture looks white, light, and fluffy.
- In a small bowl, whisk together the buttermilk, egg, and Liquid Cotton Candy. With the mixer on low speed, slowly pour the buttermilk mixture into the butter mixture and mix until fully incorporated. Scrape the bottom of the bowl with a spatula and mix for an additional 15 to 30 seconds, until combined.
- Add the flour, baking soda, salt, and baking powder to the wet ingredients and mix on low speed until just combined. The dough is fully mixed when it comes together and pulls clean away from the sides of the bowl. If the mixture is dry, add a teaspoon of buttermilk at a time, until you can easily scoop it.
- Divide the cookie dough evenly between 2 medium bowls. To one bowl, add the soft pink gel food colouring with a toothpick and knead the colour into the dough using your hands until it is mostly pink. To the other bowl, add the sky blue gel food colouring with a toothpick and knead the colour into the dough, until it is mostly blue. Place the pink dough and the blue dough into a medium bowl and mix by hand, until the colours are swirled together, being careful not to overmix.
- Using a medium cookie scoop, scoop the cookies onto the prepared baking sheets 1 to 2 inches apart. Using the base of your palm, flatten the cookies to the desired size and shape.
- Bake for 5 to 6 minutes, or until the edges of the cookies begin to brown. Let cool on the baking sheets for 5 minutes before transferring them to a wire rack to cool completely.
Cotton Candy Buttercream
- In the bowl of a stand mixer fitted with the whisk attachment, whip the butter on low speed for 30 seconds. Increase the speed to high and whip for 2 minutes. Reduce the speed to medium and add the icing sugar. Whip for an additional 30 seconds. Increase the speed to high and whip for 2 minutes, until the mixture looks light and fluffy. Scrape down the slides of the bowl. Add the vanilla bean paste and Liquid Cotton Candy and whip on high speed for 1 minute.
- Divide the buttercream evenly between 2 medium bowls. To one bowl, add the soft pink gel food colouring and mix with a spatula until the colour is uniform. To the other bowl, add the sky blue food colouring and mix with a spatula until the colour is uniform.
Assembly
- Transfer the Cotton Candy Buttercream to a piping bag fitted by a No. 8B tip by adding small scoops to the bag, alternating between the pink and blue buttercream. Flip over half of the cookie and pipe the buttercream onto each with an even pressure, starting from the inside of the cookie and swirling outward in a circular motion until the middle of the cookie is completely covered in buttercream. Leave a ½-inch ring of cookie around the exterior edge.
- Place the remaining cookies, right side up, on top of the buttercream and press down gently to help them stick. The buttercream will spread slightly to the edges of the cookies.
- Place the finished cookie sandwiches in the fridge to chill for easier handling. Store cookie sandwiches in an airtight container in the fridge for up to 4 days.
Vanilla Bean Cupcakes
Vanilla Cupcakes
- 1 ¾ cups all-purpose flour
- 1 cup granulated sugar
- 1 teaspoon baking powder
- ¼ teaspoon baking soda
- ¼ teaspoon salt
- ¾ cup unsalted butter, room temperature, cut into cubes
- ⅓ cup egg whites (about 2 eggs)
- ¼ cup sour cream
- ½ cup whole (3.25%) milk
- 1 tablespoon pure vanilla extract
Vanilla Buttercream
- 2 cups unsalted butter, room temperature
- 3 cups icing sugar
- 1 ½ teaspoons vanilla bean paste
- 1 to 2 drops soft pink gel food colouring
Vanilla Cupcakes
- Preheat the oven to 350℉. Line 2 cupcake pans with 16 cupcake liners.
- In the bowl of a stand mixer fitted with the paddle attachment, combine the flour, sugar, baking powder, baking soda, and salt. Mix on low speed for 30 seconds. Add the butter and continue to mix on low speed for 2 minutes, or until the mixture has the texture of wet sand. Do not overmix. Slowly pour in the egg whites and mix until just combined. Scrape down the sides of the bowl. Add the sour cream and mix until just combined.
- In a measuring cup, whisk together the milk and vanilla. With the mixer on low speed, slowly pour the milk mixture into the bowl and mix until just combined. Scrape down the sides of the bowl and mix again for 10 to 15 seconds. The batter will look a little lumpy.
- Divide the batter evenly among the cupcake liners, filing each three-quarters full. Bake for 15 to 18 minutes, or until a toothpick inserted in the middle of a cupcake comes out clean. Loet cook for 5 minutes in the pan before transferring the cupcake to a wire rack to cool completely.
Vanilla Buttercream
- In the bowl of a stand mixer fitted with the whisk attachment, whip the butter on low speed for 30 seconds. Increase the speed to high and whip for 2 minutes. Reduce the speed to medium and add the icing sugar. Whip for an additional 30 seconds. Increase the speed to high and whip for 2 minutes, until the mixture looks light and fluffy. Scrape down the slides of the bowl. Add the vanilla bean paste and the food colouring and whip on high speed for 1 minute.
Assembly
- Transfer the Vanilla Buttercream to a piping bag fitted with a No. 8B tip. Pipe the buttercream onto each cupcake with an even pressure, starting from the inside and swirling in a circular motion until you round the cupcake twice. Release pressure from the piping bag and pull it away for a clean finish.
- For maximum freshness and deliciousness, serve cupcakes on the day they are made. If you want to bake the cupcakes a day in advance, store the baked, undecorated cupcakes in an airtight container at room temperature until ready to decorate and serve.